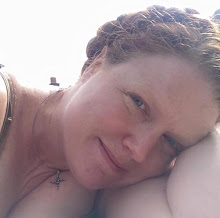
I didn't make cake last weekend. Instead, I'm going to make it this weekend. In the meantime, I have several crochet projects to finish: tiny clothes for my sister's daughter. We're expecting her to arrive at any moment. My sister is under doctor's orders to relax, in order to delay labor (she's been to the hospital once already).
Wednesday, June 3, 2009
Projects and Cake
Tuesday, April 7, 2009
Project Updates and Miscellany
Over the weekend, I finished crocheting a dress (mine's dark green) and put a lining in a skirt I crocheted last year. My next project will be finishing a sleeve apiece on the Baby Doll Dress and the Baroque cardigan. Then, I hope to start on the Cecilia chemise and some baby clothes for my youngest sister's due-in-June daughter.
Last week, I cooked up some flaxseed hair gel in my kitchen. It's based on several herbal hair treatment recipes I've found over the years. I have attempted to make flax gel a few times before, but was never happy with the results. Basing the recipe on a good-for-hair herbal infusion seems to have done the trick. It seems to help encourage my hair's curl, which I love; I like my hair long, but the weight of it usually pulls the curl out and makes it wavy, with curls at the ends (still nice, in my opinion). It's a pretty liquid-y gel, so apply a lot of small amounts to keep it from pouring out of your hands. There's nothing in it that will build up on your hair, so don't be afraid of applying too much. If it dries crunchy, scrunch your hair gently with your hands until the crunch is gone. Here's the recipe.
Herbal Flaxseed Gel
5 cups distilled water
2 tbsp each of the following dried herbs:
nettle
cherry bark
burdock root
chamomile flowers
lavender flowers
1/2 cup (rounded) raw flax seeds
1/4 cup pure aloe vera gel (a health-food brand like Lily of the Desert, not the green sunburn-treatment kind)
smidge honey (1/4 tsp or less)
smidge jojoba oil (or other natural vegetable oil - 1/4 tsp or less)
10 drops lavender essential oil (or your favorite scent)
Bring the water to a boil in a medium saucepan (glass or stainless steel). Add the herbs and reduce heat. Simmer for 15 minutes, stirring occasionally. Take off heat and cover. Let steep until cool.
Strain the liquid into a glass bowl, squeezing as much liquid as possible out of the herbs. Wash out the pan and pour the infusion back into it. Reheat to boiling and stir in the flax seeds. Reduce heat and simmer for 5 minutes or so, stirring occasionally (the longer you cook it, the thicker the gel will be). Strain into a bowl. Whisk in aloe vera gel, honey, and oil. Let cool to lukewarm. Add essential oil. Pour into a clean bottle and store in the refrigerator.
Vary the recipe to suit your hair type. Some people say Epsom salts encourage curliness; I've tried adding some and it makes my hair stiff and tangle-prone, but your hair might like it fine. I've also poured some of this into a spray bottle, diluted it with more aloe vera and distilled water, and used it to refresh my curls in the morning. It works!
Looking out the window, I see it's snowing again. Everyone seems crabby about it except me.
Best wishes and good luck to Kristina, who's traveling to China today (and tomorrow, too, probably!). See you in three weeks!
Thursday, April 2, 2009
Finished: Lacy Sleeveless Top
From a pattern by Valerie Kurita, published in the first crochet magazine I ever bought (back in 2006), I have made this pretty white top.
I used some shaping techniques learned from articles and books by the marvelous Doris Chan, and it fits really well. It will have to wait for warmer weather to be worn, but I can wait.
I have still to finish (again) the baby-doll dress designed by Amy O'Neill Houck; I am reworking the sleeves to be shorter and puffier. I really love the dress and am eager to finish it so I can wear it again.
This month, I had an unusual amount of bills to pay, with more expenses to come in the next couple of weeks, so buying the beautiful yarn I intend to use for Jennifer Hansen's Cecilia chemise (both lengths!) will have to wait a while. Right now, my money needs to go towards caring for myself; buying pretty yarn is a great way to do that, but the care I need right now is of the inner sort. I am not afraid of heavy emotional and psychological work, but I am afraid to pry this particular monster out into the light where I can work on befriending it. Or slaying it. I'm not sure which it will be.
In the meantime, I will continue to live my happy life...there is so very much to love and to savor.
Tuesday, March 17, 2009
Portable Shade
"The parasols this year look like big, beautiful flowers that have grown and blossomed at will without having a single pretty fancy restrained or pruned away. Like all of this Springs work they are characterized by a picturesque and irresponsible variety that refuses adherence to any one pattern. Any sort of parasol may he carried with the assurance that the more it differs from every other parasol the more it will he approved." -- The New York Times, May 1, 1892.
The days are growing longer, which reminds me that everyone should use sunblock. I like Neutrogena's SPF 30 for sensitive skin, but sometimes I forget to apply it or to tuck it in my purse before going out. My two failsafe measures are a large hat and a parasol, both of which are much harder to overlook and leave behind.
I have a large head covered with a lot of thick, long hair. Finding hats that fit is difficult for me, especially as I frequently wear my hair pulled or pinned up, and so I decided to make one, thereby guaranteeing a good fit. Last year, I found this pattern by Lily Chin, and I executed it in jute twine from the hardware store for a rustic look. Lily models her hat pushed back from her face, but I wear mine level across my forehead to shade my face and throat. I made two hatbands which coordinate with just about everything I wear; I swap them according to my outfit and pin them with an antique brooch. The hat draws lots of compliments, but the parasol draws stares.
On eBay, that bargain-hunter's playground, I found a Chinese paper parasol, dated about 1920. Its paper canopy was torn in several places, so I mended it with tissue paper and Elmer's glue. The patches are white, but I haven't figured out how to stain them to match the rest of the canopy without dissolving the paper. They don't show much, fortunately, so I may leave them as they are. The parasol shades me well, allowing only dim sunlight to touch my skin. I used it for most of last summer, and between it and the hat, I didn't get sunburned once. As fair as I am, that's quite a feat.
We all need some unprotected exposure to sunlight (ten to fifteen minutes a day, I have read) to help our bodies make vitamin D, a nutrient necessary for regulating the body's calcium and phosphorous levels. Sunshine feels good, and it's good for us. But baking our skin, whether in the sun or a tanning parlor, is a great way to wind up with prematurely aged skin or, at worst, skin cancer. Even if your skin is olive or dark, excessive sun exposure can cause damage, but paler people are much more susceptible.
Enjoy checking out the parasols at these links. Maybe we'll start a trend!
Darna's East Angel Harbor Hat Shoppe -- elaborate, hand-decorated parasols and hats
Designs by Victoria -- parasols, fans, and other goodies
Lace Parasols: Undercover Elegance
Luna Bazaar -- colorful paper parasols
Pamela's Parasols
Parasols at Gentleman's Emporium -- oodles of other lovely wearables and accessories, too.
Shooting Star History -- patterns and supplies for making your own parasols
Posted by
Meaux
at
7:43 PM
0
comments
Labels: beauty, crochet, lace, self-care, skin care, victoriana
Tuesday, February 17, 2009
Translation: Irish crochet

Turns out, yes, a "d" and a "plain" are old names for what American crocheteuses know as "single crochet" or "sc." Apparently, in the Old Days, no standards existed for pattern abbreviations. Experimentation and careful comparison of my work with the photos in the DMC books showed that I knew much more than I had imagined upon my first reading of the patterns.

The photos in this post are themselves experiments, depicting the results of my Irish crochet experiments; I've not used my computer's on-board camera much. I yearn to fill this blog with beautiful photographs, but I fear that time is not yet come. I will, however, offer you my translations of antique Irish crochet motif patterns. You can read them in their original form at the Antique Pattern Library's site. The large motif (called "second wheel" in the book) is from DMC Library Irish Crochet Lace by Mme. Dillmont (c. 1900), and the leaves are from Priscilla Irish Crochet Book No. 2 by Eliza Taylor (published in 1912). The books are listed alphabetically by author last name.
Dixie Falls designed the mitts (free registration is required to get the pattern); I made adaptations to suit my chosen yarn and my own hand size. I arranged the motifs on a scarf I crocheted from my favorite silk/bamboo yarn; it's a plain, long rectangle executed in V-stitch, with 7 rows of hdc at each end.
The roses are among the easiest Irish crochet motifs to execute, and you can find many versions of them everywhere. I kept it simple and used Ms. Fall's instructions. The smallest roses on the scarf are made from the same pattern, but I only completed two rounds. I also omitted the last round from the larger roses; as written, the pattern yielded roses I thought were overwhelmingly large on my wrists. I substituted the antique leaf pattern for that given in the mitts pattern (they come out looking about the same, in case you prefer Ms. Fall's more complete instructions).
The crocheted balls were a popular embellishment in the Victorian and Edwardian eras, and their instructions are included in the mitts pattern. I made ten of them to use as fringe for the scarf, and their weight keeps the scarf nicely in place. I decorated each motif with glass seed beads, and capped the end of each ball with a larger silver bead.
Main layer:
Wrap cord three times around your finger to form a type of magic adjustable ring. Leave a long tail (12") to use as a foundation cord while working the rest of the motif.
Round 1: Work 20 sc over cord, pulling the free end occasionally to nudge the stitches tightly together; sl st to 1st sc to close; ch 1.
Round 2: Pull up "tail" of adjustable ring and lay it over work. 1 sc in 1st sc and over cord; * 14 sc over cord only; sk 3 sc; sc in next sc (scallop made). Repeat from * 4 times, pulling cord to nudge stitches together and to help each loop lie flat. End with 1 sc in last sc of ring, sc in 1st 2 sc of petal, ch 1 (5 scallops).
Round 3: Holding foundation cord over work and working in back loop of each sc, * sc in next 2 sc, picot (ch 3, sl st in 1st ch), 3 sc, picot, 3 sc, picot, 2 sc. Sk next 5 sc. Repeat from * 4 times. Fasten off.
Top layer: Begin as for main motif, wrapping cord three times around your finger to form an adjustable ring.
Round 1: * 4 sc in ring, picot. Repeat from * 5 times. Fasten off.
Position top layer atop main layer, matching center holes. Sew them together with matching thread.
Leaves:
Ch 10. 1 sc in 2nd ch from hook, sc in each of next 8 ch, ch 3. Continuing down other side of foundation ch, sc in each of next 7 sts, * ch 3, turn. Sc in each of next 7 sc, sc in 3-ch sp, ch 3, sc in 3-ch sp, sc in each of next 6 sts. *
Repeat between * *, working back and forth, until you have 6 "ribs" on each side (or until the leaf is the size you prefer). I chose to fasten off with a sl st in the 3-ch sp, in order that the leaf would be even, but you can fasten off wherever you think it will look best.
My materials:
Mitts, scarf ends, ball fringe, and leaves: 3 skeins Berroco Seduce in Verdigris; small amount of fiberfill to stuff crocheted balls
Scarf: 3 balls Patons Silk Bamboo in Sea
Small roses: 1 ball Patons Silk Bamboo in Almond (very small amount; I used leftover yarn from another project)
"Second wheel" and large roses: 1 ball J.P. Coats Royale Silkessence Microfiber in Natural (#2262)
Silver or silver-lined glass beads in two sizes (about five hundred seed beads and a larger silver bead for each crocheted ball)
Steel crochet hook, size 7 (for mitts, "second wheel," large roses, leaves, scarf ends, and crocheted balls)
Aluminum crochet hooks, sizes G (scarf body) and B (small roses)
Tapestry needle
Beading needle
Sewing needle and thread to match yarns
Posted by
Meaux
at
11:49 AM
0
comments
Labels: crochet, lace, victoriana